Git Version Control System
Git is the most popular open-source distributed version control system. It helps record the changes made to the software development projects over time and allows rapid collaborations between developers.

In this code note, we will cover the following basic version control system concepts:
- Git configuration
- Git Usage
- Repository
- Git Virtual Areas
- Git Workflow
› Git Configuration
You must configure git when you use it for the first time. Since it is a collaboration tool, it must know who the editing author is among many collaborators. Therefore, the following configuration item is a must before its usage.
| config item | Details |
|---|---|
name |
full name of the collaborator |
email |
email used for github registration |
editor |
default editor git should use |
Each of the above configurations can be made on the following levels on your personal computer.
systemapplies to all the user of this computer and all of their projectsglobalapplies to all the projects of current userlocalapplies to the current project open
We will make all of our configuration on global level.
Expand to see details of each of the following first-time configuration items:
name
Execute the following git command to configure your full name. Whenever you make a code change, git displays this name as the editing author.
Execute the following git command to configure the email address you used to sign up for GitHub. The email must match one of the addresses in your GitHub setting.
editor
Execute the following git command to set the default text editor for git. We can make a complete backup of a software project using git; we need to describe this backup; for this, we have to use a command-line text editor. We will use a nano text editor.
› Git Usage
Git is used to cloning the software project, track code changes, and enable developers to collaborate on development activities. As a result, it accelerates software development and simplifies software deployment process.
.png?alt=media&token=c6811aba-c9b0-49c4-b9cf-1fcbdbf4bc7a)
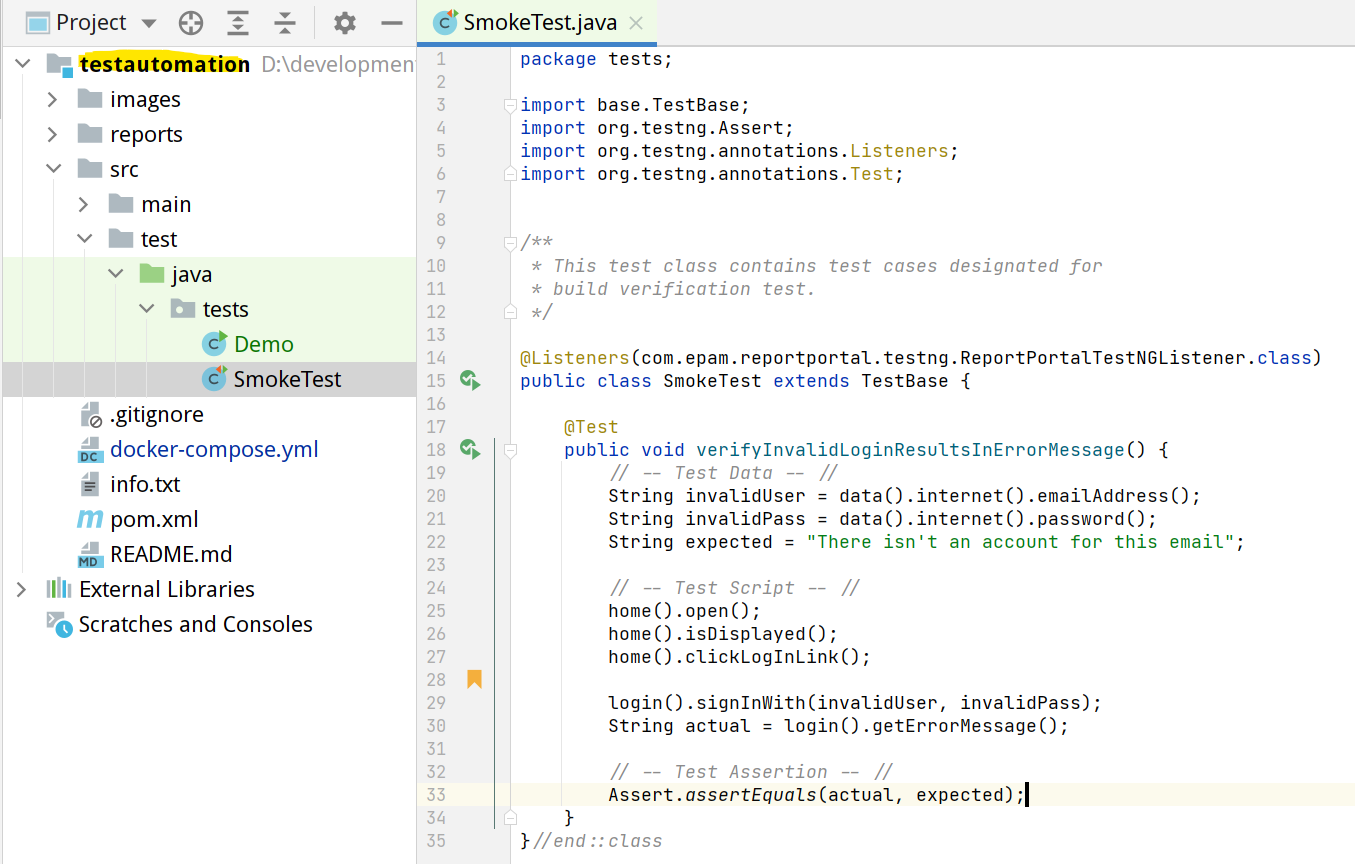
Software Project:
Software project is just a folder that contains sub-folders, medias and code files . Every software is essentially a folder from the perspective of its developers. This folder goes through deployment process to turn into running software that everybody uses in their day-to-day basis.
Watch this short video to understand the usage of git:
Git usage in project & deployments
- project code management & collaboration tool
- rapid app deployment of desired version of application
› Repository
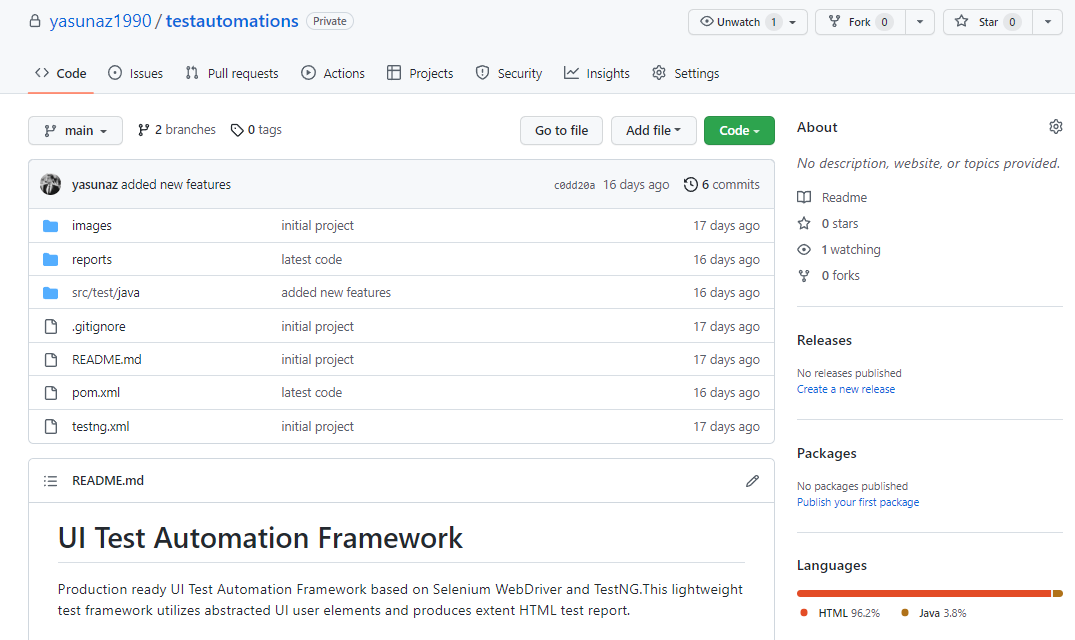
To utilize the git, we must turn our project folder into the repository. A project managed by git is regarded as a repository. There are two types of repositories.
local repositoryrepository that is available on your local computerremote repositoryrepository available on remote hosting services (github.com)
You can turn your project into local repository by invoking following git command
.git/ database folder in the project's root directory; this special folder will contain all the metadata that git will require for tracking the project.
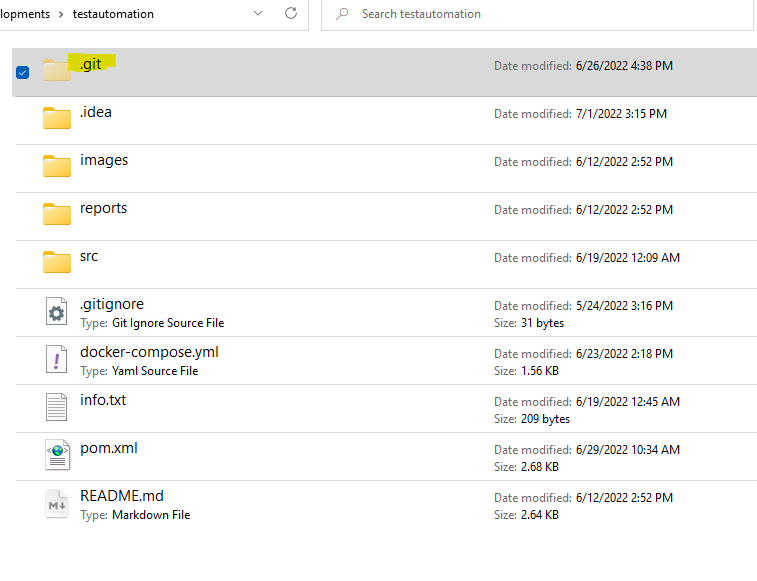
Without this .git/ folder, git will not recognize your project as a repository.
› Git Virtual Areas
Now that we have a project that has turned into a repository, we want git to track the contents of the entire project. Git uses three designated virtual areas for project tracking.
- Working Directory stores all the changes detected as file names.
- Staging Area stores cherry-picked changes from Working Directory.
- Repository stores a project snapshot that includes changes from Staging Area.
.png?alt=media&token=c20e073b-2431-445e-96b1-7cd635a8d655)
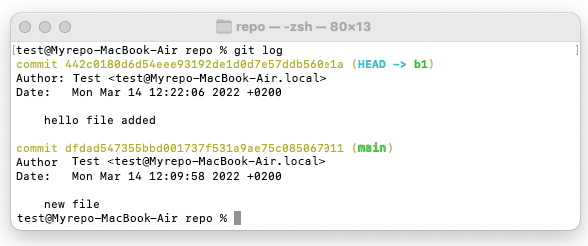
To see the list of changes from the Working Directory and Staging Area, use the following command.
Result of git status Command
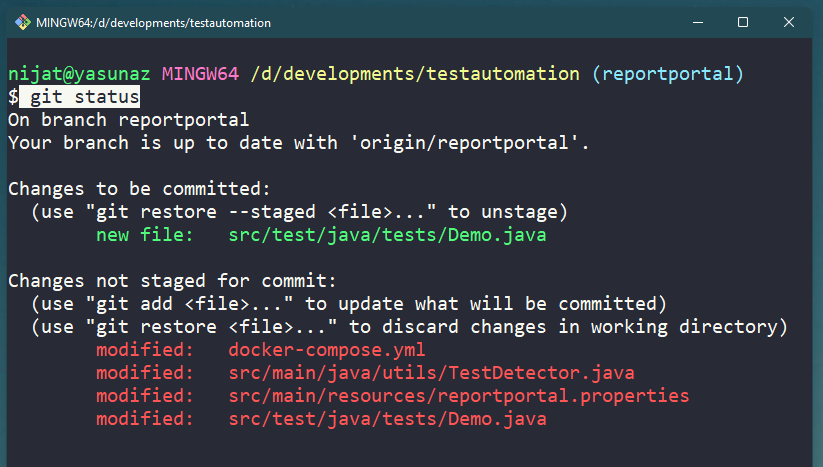
- changes listed on the Working Directory is red color.
- changes listed on the Staging Area is green color.
To see the list of snapshots (back-ups or commits) of the project taken at a specific time by all the developers, use the following command.
Result of git log --graph Command
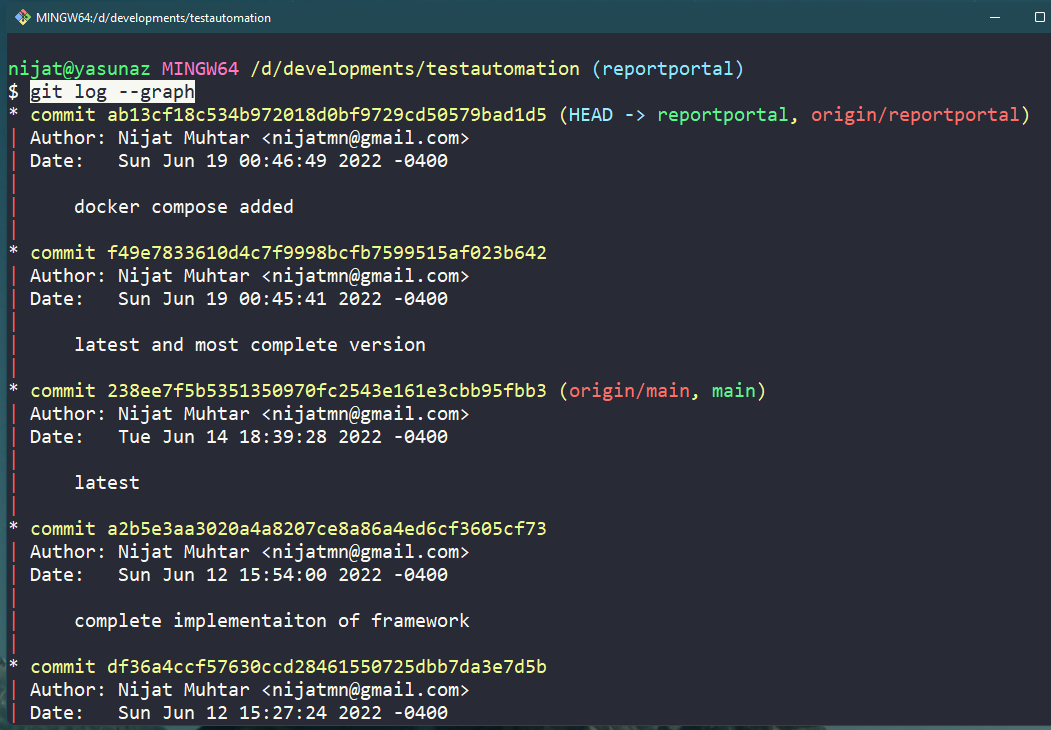
notes that each sommit has following deatils
- commit id: uniquely identifies the snapshot
- author : developer who made the sanpshot
- data : date the snapshot was taken
- message : short messages describes the snapshot content
Even though git tracks every change that has happened to the project, you can configure git to ignore the changes to specific files and folders by specifying them in the .gitignore file.
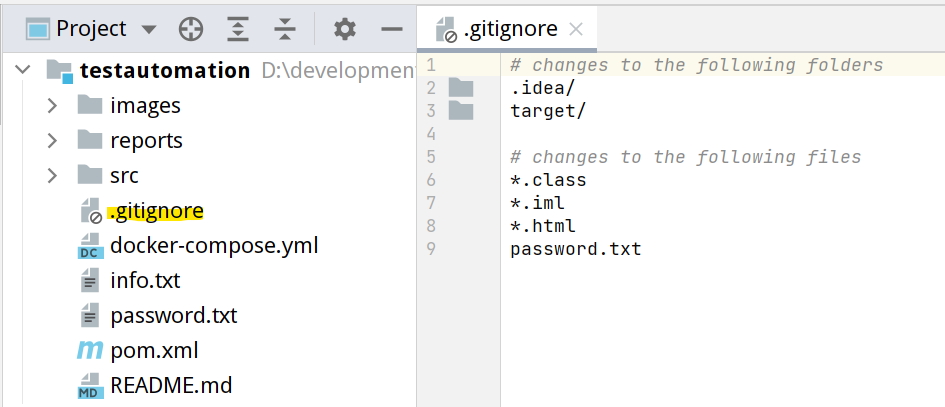
This file must be created in the project's root directory. Just list the name of files and folders that you don't want to be tracked by Git.
› Git Workflow
You are now ready to start the development activity on your repository. Here are the general Git workflow steps:
- Edit the project
- See the changes on Working Directory
- Move the desired changes to Staging Area
- Take a snapshot once the milestone is achieved
- Confirm the snapshot
Editing the project can be done with any desired code editor or choice. Note that the following action counts as changes for the git.
Use the git status command to see the changes on both Working Directory and Staging Area.

Once you see the changes, you meant to make on Working Directory, move them to the Staging Area by using the git add command.
Once all the desired changes have been moved to the Staging Area, you can now take a Snapshot ( back-up ) of your project so that you can save the project as it is for future reference. Use the git commit command to take a snapshot.

After the project snapshot has been taken, use the git log command to see the snapshots and make sure that your latest snapshot is listed as the first item.
Here is the list of some helpful git log command varients.
› Git Command Practice
Practice typing git commands you have seen on these notes. If you find any errors on the command listed, please notify Nijat.