Advanced Element Interactions
As the modern web application became prevalent, more complex and advanced user interactions with the web application became available to the users. We have to be able to simulate such user interactions in our automation scripts.

This code note will cover the following advanced user action:
- Scrolling
- Slider
- Highlighting
- Resizable element
- File upload
- iFrame
› Scrolling
Scrolling on the page is one of the most common user interactions. Since scroll actions are not part of the web application, the driver cannot simulate them on its own. Selenium provides access to the browser's JavaScript engine to address this shortcoming, where JavaScript code can be executed. All browser actions can be simulated by providing JavaScript code to the JavaScript engine. We can do this by casting the driver object to the JavascriptExecutor object.
Through the JavascriptExecutor object, we can send custom JavaScript code that simulates complex user interactions with the browser.
Scrolling up and down on any web page is possible by following JavaScript code:
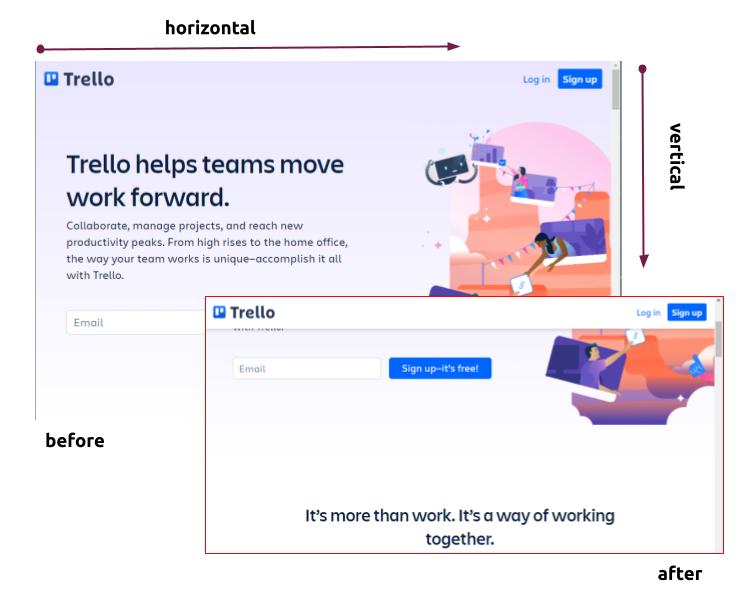
In this JS code, the window object refers to the open browser window. The first argument of the scrollBy method takes horizontal pixel counts for horizontal page scroll, and the second argument takes vertical pixel counts for vertical page scroll.
| Scroll down the page by 600 pixel | |
|---|---|
When we need to take a screenshot for test execution, the element we interact with needs to be present in the screenshot. We can scroll down to the element in the user's view by using the following JavaScript code.
| Scroll to the element ( into view ) | |
|---|---|
Using the JavaScript code, we can simulate the scrolling of the element into the view by:
› Slider
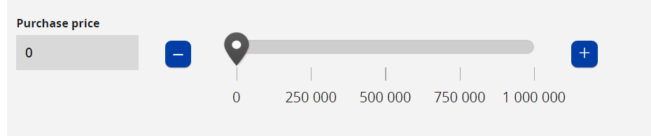
Sliders allow users to select a value by dragging and dropping a handle, where the value can be a price, quantity, or time. The web page could use a textbox to get the same information from users; however, the page becomes much more engaging with the sliders.
Example of a slider :
Since the slider is part of the web app, the driver can simulate the usage by using the Actions class as follows:
However, occasionally this code does not work. To ensure that the slider simulation code works at all times, we will once again use JavaScript to simulate the slider usage.
› Highlighting
Often test automation execution requires taking a screenshot for reports. For this reason, we need to highlight every element we will be interacting with our automation script. The driver cannot highlight an element, but the JavaScriptExecutor object allows us to highlight an element through JavaScript code.
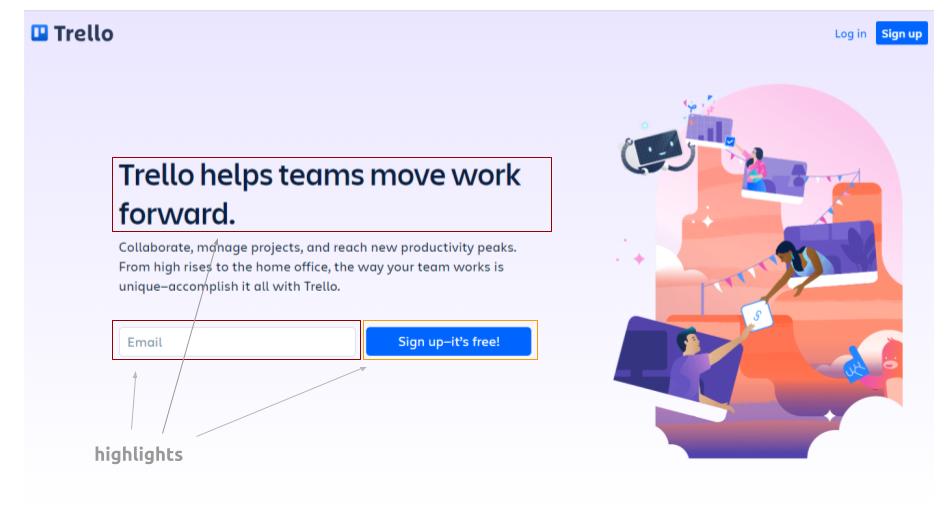
Example of element highlight:
JavaScript code for element highlighting:
Using this JavaScript, we can highlight the element we want to highlight:
We will use this code extensibility for the production level test automation framework. Please make sure to memorize the code.
› Resizable element
In some web applications, you will see a resizing functionality where you can resize an element by either increasing or decreasing its width and height. To automate resizing functionality, you can combine the clickAndHold() and moveByOffset() methods of the Actions class to achieve that.
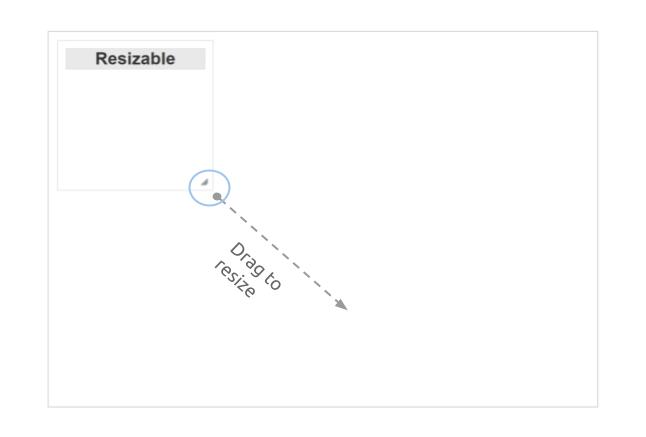
The clickAndHold() method needs the current web element as a parameter.
- resizeIcon: The element on this example code that is to be clicked and held.
The moveByOffset() method needs the horizontal and vertical offsets as parameters.
- offsetX: The horizontal offset in pixels to which to move the mouse, 400 pixels in the example code above.
- offsetY: The vertical offset in pixels to which to move the mouse, 600 pixels in the example code above
› File Upload
File upload is performed when there is a need to upload any file or a document on a specific website, such as forms, registration pages, document uploaders, etc. Uploading a file process includes browsing a file from the desired location or your computer and uploading it to the website.

As you can see from the above image, uploading a file requires you to work with your operating system. Regardless, the web application receives the target file that must be uploaded as a file path string. We can send this file path string in our code to accomplish the file upload.
Simulating file upload
As you can see, we just extracted the file upload input element and sent the file path string as a text. That is all required for simulating users uploading a file in web applications.
› iFrame
Some web applications embed the content of the external websites into the web page. This can be achieved by using an iframe element to load the entire external site within the containing site. Although it is not common on modern web applications, you should see its usage.
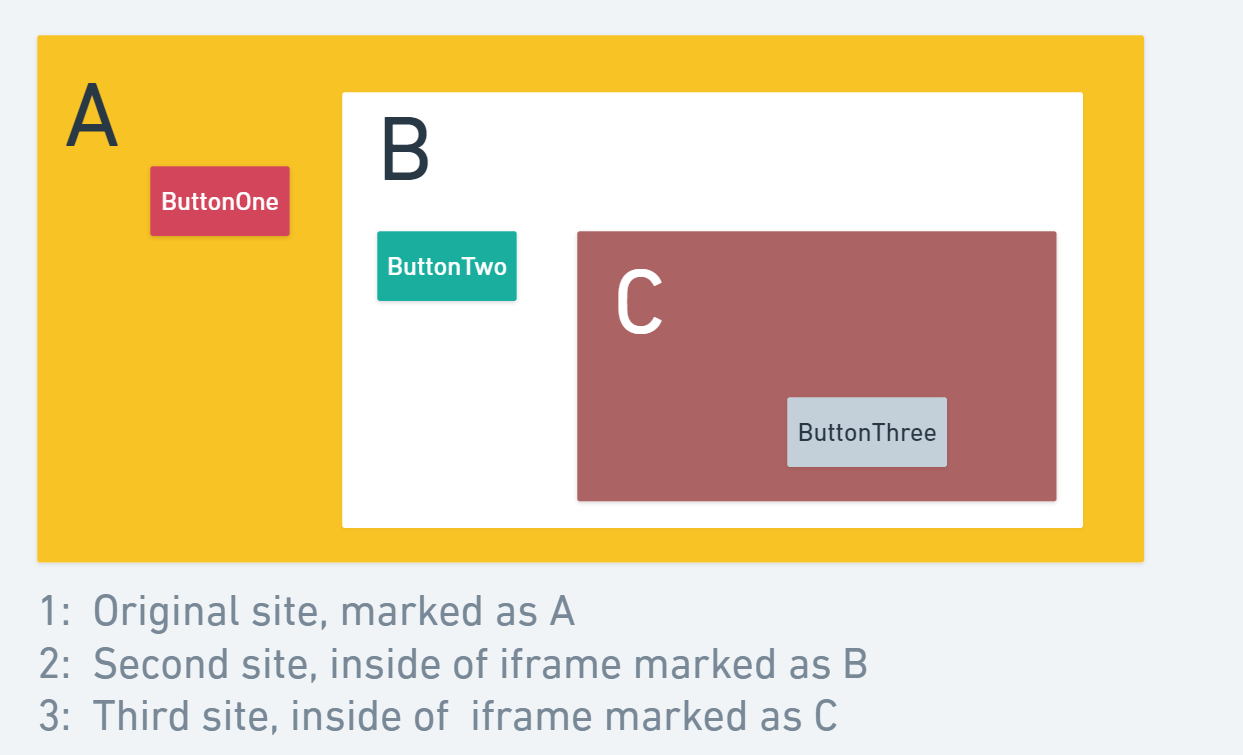
In our example above, we have the original site marked at A that contains another site within the iframe marked as B where, on its own, it has an inner site within the iframe marked as C.
Working with the element inside an iframe is exactly the same as we already know how to work with elements. The only thing special about working with an iframe is to switch the focus of the driver to the target iframe so that we can interact with the elements within it.
Switching to iframe B and click ButtonTwo
Switching to iframe C from the iframe B
Now that the focus of the driver is on the iframe marked as C. We can go back to the original site or we can go back to the parent iframe marked as B.
Going back to parent iframe B from iframe C
Going back to the original site marked as A from either iframe B or iframe C