Selenium WebDriver
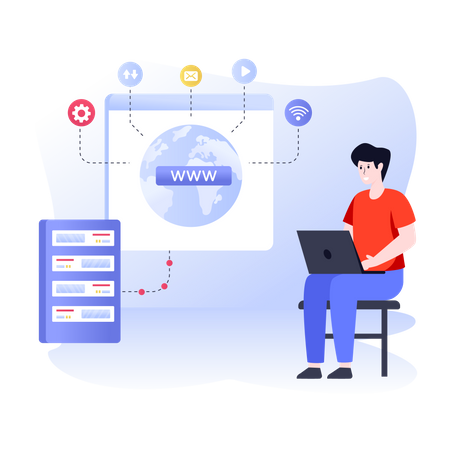
Selenium WebDriver is a code library that allows us to automate browser interactions. It is the most preferred code library for UI test automation for web applications.
In this code note, we will cover following topics:
- WebDriver Architecture
- Connecting to Browsers
- Changing Window Size
- Visiting Specific Site
› WebDriver Architecture
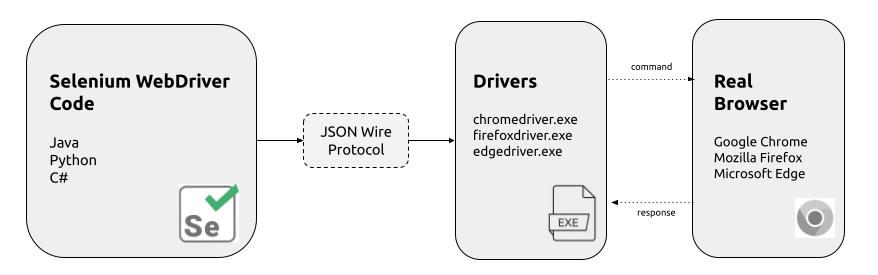
All Selenium code you write will be sent to the driver software, where the conversion of your Java code into a command an actual browser understands takes place. The way Selenium code interacts with the actual browser has changed with the latest library releases.
Selenium WebDriver 3
This version of Selenium uses JSON Wire Protocol to interact with drivers. JSON Wire Protocol specifies how the automation Java code ( clicking, typing, etc.) should be relayed to the driver software.
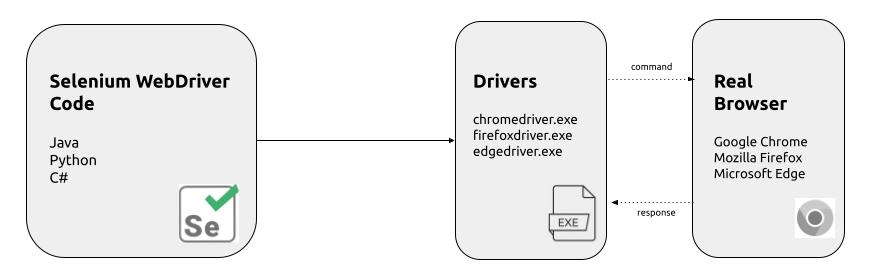
Selenium WebDriver 4
With the latest version 4, your UI automation code can directly communicate with the drivers without using the bulky and slow JSON Wire Protocol. As a result, automation code with version 4 is considerably faster.
Establishing Browser Connection
To send any automation commands to the actual browser, you must have the driver executable up and running with your code. Luckily for us, just making a WebDriver object will establish the connection between your Selenium code and the running driver software.
Now you are ready to write browser automation code using the driver interface variable.
Connecting to other Browsers
Here is a sample code for connecting to other browsers
Connecting to the browser with headless mode
The automation script must run as fast as possible when executing the test on a dedicated server. Every browser has a headless mode where the browser's display is turned off. This mode will make the browser hyper-fast and stable.
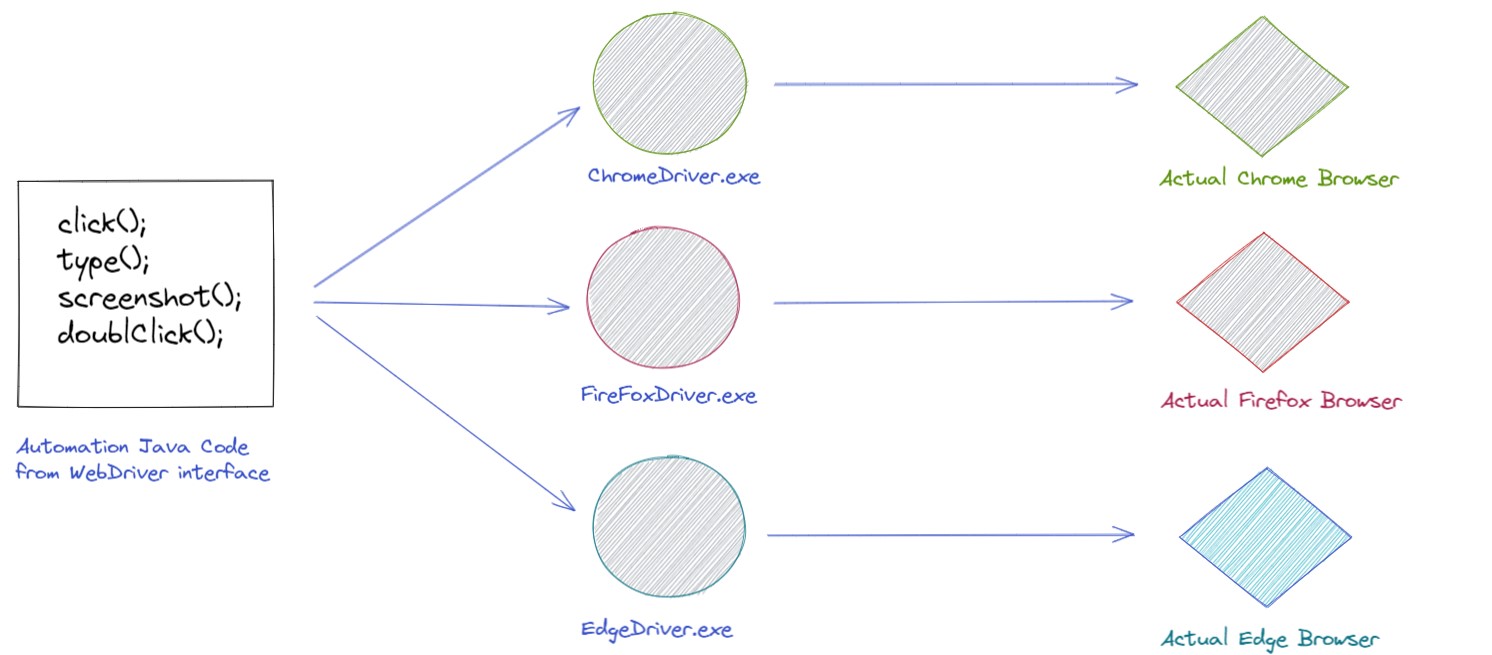
› WebDriver interface
All Selenium code you write must pass through the running driver software to reach the actual browser. Each browser has its corresponding driver software that sends automation commands to the actual browser. Selenium allows us to work with this driver software through its WebDriver interface.
This WebDriver interface has the following methods:
| Method Detail | Description |
|---|---|
void close() |
Close the current window, quitting the browser if it's the last window currently open. |
WebElement findElement(By by) |
Find the first WebElement using the given method. |
List<WebElement> findElements(By by) |
Find all elements within the current page using the given mechanism. |
void get(String url) |
Load a new web page in the current browser window. |
String getCurrentUrl() |
Get a string representing the current URL that the browser is looking at. |
String getPageSource() |
Get the source of the last loaded page. |
String getTitle() |
Get the title of the current page. |
String getWindowHandle() |
Return an opaque handle to this window that uniquely identifies it within this driver instance. |
Set<String> getWindowHandles() |
Return a set of window handles which can be used to iterate over all open windows of this WebDriver |
Options manage() |
Gets the Option interface |
Navigation navigate() |
An abstraction allowing the driver to access the browser's history and to navigate to a given URL. |
void quit() |
Quits this driver, closing every associated window. |
TargetLocator switchTo() |
Send future commands to a different frame or window. |
All of this method can be used for all the browsers. Let's take a look at usage example of a couple of these methods.
› Configuring Driver
Sometimes the default size of the browser window is not adequate for the screenshots. Selenium gives us various ways to determine the size of the browser window.
Opening Browser with Full-Screen Mode
Opening Browser with Max Size ( screen fit ) Mode
Opening Browser with Specific Screen Size
Opening Browser with headless mode
Every browser has a headless mode where the browser will not be rendered to the user. The browser and website are there and displayed, but they are not rendered to the user. The headless mode is designed for processes or programs that use the browser. With headless mode, the browser works faster, and almost all of our scheduled test execution is carried out with the headless model enabled.
› Visiting Specific Site
Once the connections between your Selenium code, driver, and browser has been established. Then, we can start browser automation through the WebDriver interface.
For example, we can tell the browser to visit a specific webpage with the following two driver methods.
get( String url )
navigate( ).to( String url )
Please make sure to use get(String url) for visiting the webpage with Selenium. The difference between these two methods are as follows:
get(String url)method visits the specified page and it will wait until the entire webpage is loaded.navigate().to(String url)method visits the webpage and it does not wait for page load.
› Summary
Please watch the following video for the summary of all the topics presented in this code note. If you want to follow along with the instructor, please clone the following template project.
GitHub Repo: AlphaleafTech/note_selenium
|
Please watch the video with 1.25 playback speed
Note Summary Video